How to Perform an Initial (Primary) Assessment in the Wilderness
In our previous blog post, we outlined the key components of the Patient Assessment system: Stop and Fix, Gather, and Stay or Go, and explained why a solid understanding of this framework is essential for providing effective patient care in the wilderness. In this post, we’ll take a closer look at the first step of Patient Assessment: the Initial (Primary) Assessment, also known as the STOP and FIX phase.

STOP and FIX: Initial (Primary) Assessment
During the first phase of patient assessment, your goal is to determine what’s happening, ensure the safety of both yourself and the patient, and identify and address any life-threatening conditions. Think of this phase as a STOP sign, with its eight sides representing the distinct steps of the primary assessment. Each step of the primary assessment is listed below.
Scene Size Up
- Breathe: Take a deep breath, giving yourself a moment to pause and evaluate the situation.
- Safe? Look up, down, and all around. Do you see any hazards? If so, you’ll need to manage them.
- Number of Patients: How many patients are there? How do they look? Humans are social creatures and we have a pretty good innate sense for when someone is really sick. This all happens as you approach the patient, before you make verbal contact.
- General Impression: Get a general impression of that patient(s). Awake? Breathing? Bleeding? Appearance? Clues as to what happened?
- Resources? Think about your resources: what stuff do you have with you and who else is there who could help?
PPE: Don Personal Protective Equipment
Our skin is a good barrier to infection. However, we often have cuts or scratches. Our eyes, nose, and mouth are also potential pathways to infection. Take a moment to protect yourself from contact with bodily fluids. You’ll sometimes hear this called “body substance isolation” or BSI. Nitrile gloves are a baseline expectation. Also consider glasses or goggles and raingear to keep blood, urine, vomit, and feces off of you.
Consent: Check Responsiveness and Obtain Consent
It’s time to make contact with the patient.
- Check Response, Obtain Consent: Introduce yourself and ask if you can help. “Hi, my name is Sam. I have some medical training. May I help you?” If they aren’t responding to your voice, you have implied consent to give care. Tap hard on their shoulders or pinch the trapezius muscle to assess for a physical response.
- Pro Tip - Keep things Moving: It’s easy at this point to get carried away in conversation about what happened to the patient. Be kind, compassionate, and respectful while gathering any pertinent details about the incident. At the same time, be direct and move to the next steps with purpose. We’re about to assess for life threats and delay may cost the patient their life. You’ll use the ABCDE model for the next five steps.
A: Assess the Airway
- Blockage is Deadly: The airway is the pathway that air takes down into our lungs. If the airway is blocked, the patient won’t be able to breathe.
- Talking? They have an Airway: If they are talking or visibly breathing, check for potential obstructions. “Do you have anything in your mouth? Please spit that out for me, ok?”
- If Unresponsive, Inspect: Open the mouth with a gloved hand and look inside the patient's mouth. Don’t blindly sweep your fingers around, but do quickly remove any foreign objects. Use a head-tilt chin-lift or jaw thrust maneuver to open the airway.
B: Check for Breathing
Now that you’ve established that the patient has a functioning (or patent) airway, are they using it? Breathing should be quiet and effortless. If they aren’t breathing or aren’t breathing normally, you’ll need to fix it with positioning, other treatments, or even with rescue breathing. “Will you take a deep breath for me? How does that feel?”

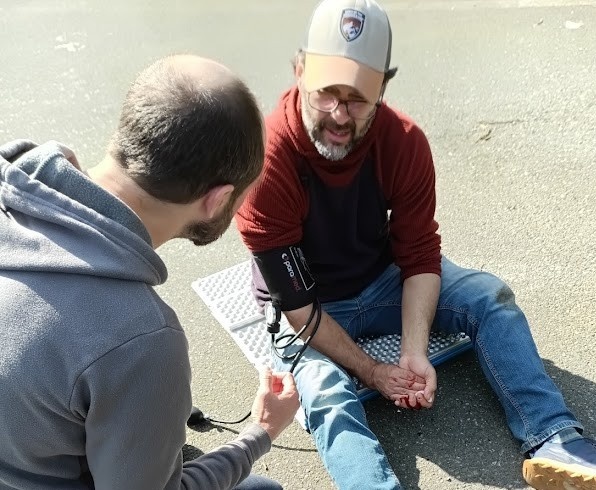
C: Check Circulation
Circulation refers to moving blood throughout the body. During the primary assessment, you need to check that the heart is in fact pumping and that the blood is staying inside the body.
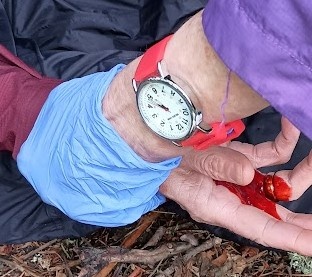
- Is the Patient Bleeding? Ask the patient, “Do you feel like you’re bleeding anywhere?” If they are unresponsive or unreliable, do a quick but thorough blood check with gloved hands. Insert your hands underneath the patient below their torso, abdomen, legs, and arms. Check your gloves at each point. If you find severe bleeding, you’ll have to stop it now.
- Pro Tip - Glove Color: Blue or gray nitrile gloves show bleeding more conspicuously than black ones.
- Check Pulse: Check the pulse for no more than 5-10 seconds. If the patient is alert, checking the radial pulse on the inside of the wrist is less invasive than checking on the neck. This also tells you they have enough blood pressure to push blood out to their arms.
- If they are unresponsive, check the carotid pulse on one side of the neck.
- If they don’t have a pulse and are unresponsive, you’ll need to do CPR.
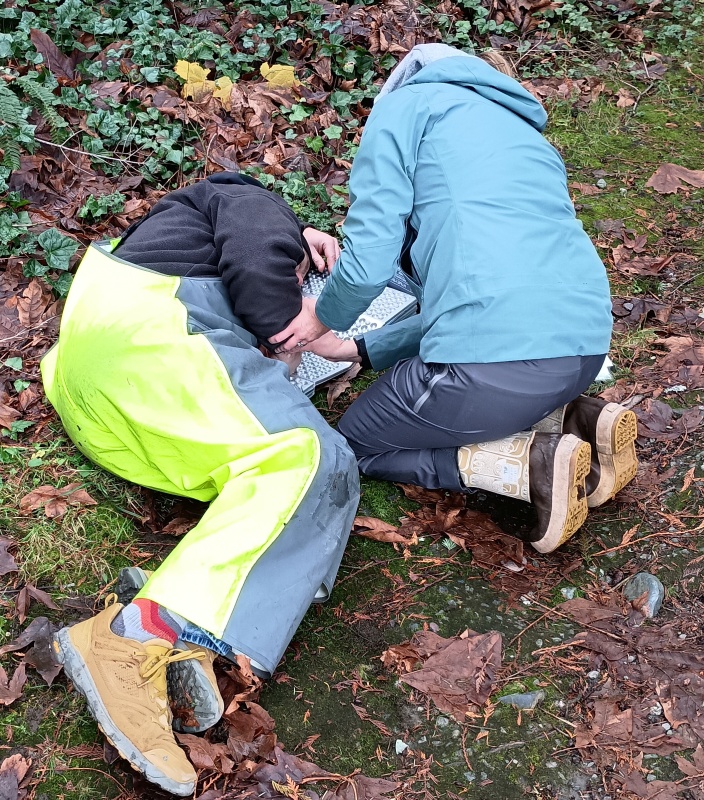
D: Disability / Decision
- Check for Potentially Disabling Injuries. Or if you prefer, check “Da spine!”
- MOI: At this point, we need to consider the Mechanism Of Injury (MOI). Did an external force act on this person? Was it strong enough to cause a head, neck, or back injury that could result in life-long disability?
- If the MOI was significant, take precautions to prevent unnecessary movement. “Did you fall or hit your head?” If so, “Ok, hold still for me. I’m going to put my hands on your head to help remind you not to move. Just answer my questions with ‘yes’ or ‘no’, don’t shake your head, ok?”
- Pro Tip - Context: You’ll also rely on context clues at this step. Did you see the injury happen? You may recognize this potential in your scene size-up.

E: Environment & Expose
Two tasks remain before wrapping up your primary assessment. Address any environmental concerns, and take a quick look at any known injuries.
- Environment - Are They Warm Enough? Injured people can get cold easily even it the weather is nice, especially when sitting or laying on the ground. Put an insulating pad underneath, zip up jackets, wrap a sleeping bag around them, and cover up with a tarp if there is rain. If they are dangerously hot, do the opposite and cool them down rapidly.
- Does it Hurt? Expose: If it hurts, look at it! This is a final quick check on any known injuries before you slow down and gather information. So take the boot off to look at that rolled ankle, or slip off the jacket and put eyes on the sore shoulder.
Finally, take another deep breath. Once you’ve gotten to this point without needing to STOP and FIX anything, you know that there are no immediate life threats, so you can slow down.
Initial (Primary) Assessment Tips
Now that you understand the steps of a primary assessment, there are a few tips and tricks to keep in mind as you practice.
- Does Order Matter?
- We teach the ABCDE model for wilderness and remote patient care because it applies to the most common backcountry injuries and medical problems that you’ll face.
- While learning, it’s helpful to practice in a methodical order.
- When faced with a real emergency, don’t feel like you have to complete these steps in exactly that order. For example, if you know someone took a bad fall and may have suffered spinal injury, take precautions to minimize movement as soon as you arrive on scene. Or if you notice spurting arterial bleeding from a laceration on their arm, go ahead and stop the bleeding before checking the mouth for foreign objects. Just be sure to complete all the steps, even if you don’t follow the ABCDE order.
- Learn to Move Swiftly: Train to move smoothly and quickly through your primary assessment. Of course, if you find a life-threat, you have to stop and fix that problem. But if you don’t find any life threats, a complete primary assessment should take a minute or less.
Practice!
Read along as you perform the steps of a primary assessment on a friend or imagined patient:
Scene Size Up: "I'm taking a deep breath. I am looking up, down, all around for my safety. I am looking at the patient(s) and getting a general impression. I am considering my resources, human and material.
PPE: “I am donning gloves”.
Consent: “Hi, my name is _________ and I have some medical training, may I help you? Great."
Airway: “Do you have anything in your mouth?”
Breathing: "Ok, can you take a deep breath for me?"
Circulation: “Do you feel like you're bleeding anywhere? I’m going to check your pulse. May I have your wrist, please?”
Disability/Decision: “So, did you fall or hit your head?”
Environment/Expose: "How’s your temperature, warm or cold? Ok, mind if I take a closer look at the injury?”
Well done! Now you know the basics of performing an Initial (Primary) Assessment for life-threatening conditions in remote or wilderness environments. Next up, we’ll move to gathering information in the Focused (Secondary) Assessment (coming soon, stay tuned!).
Published